
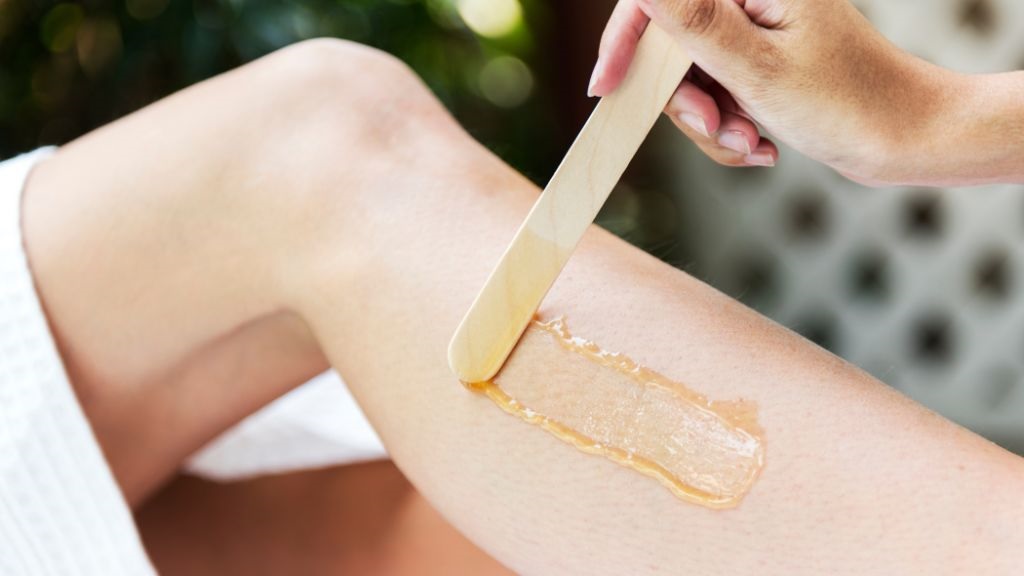
Waxing is a popular hair removal method that provides long-lasting and smooth results. While professional waxing services can be expensive and time-consuming, the convenience of at-home waxing kits has made this option increasingly popular. Whether you’re a beginner or an experienced waxer, finding the right at-home waxing kit can be overwhelming
Waxing at home can be an intimidating endeavor for beginners. The fear of pain, skin irritation, and the uncertainty of not knowing where to start can deter many from attempting at-home waxing. However, with the right tools and guidance, waxing at home can be a convenient, cost-effective, and relatively easy process. This guide aims to demystify the process, presenting the best at-home waxing kits for beginners, along with tips and tricks to make your waxing experience as smooth as possible.
Selecting the best at-home waxing kit for beginners involves finding a product that is easy to use, effective, and gentle on the skin. For those starting their waxing journey, the key is to look for kits that come with comprehensive instructions, offer a simple application process, and include post-waxing care products to soothe the skin. Here are some of the top-rated at-home waxing kits suitable for beginners, taking into account ease of use, skin sensitivity, and overall effectiveness:
Gigi Wax Starter Kit
- Why It’s Great for Beginners: The Gigi Wax Starter Kit is highly regarded for its comprehensive contents, including a wax warmer, all-purpose honee wax, pre and post-wax treatments, and applicators. It’s designed to work well on all skin and hair types, making it a versatile option for beginners.
- What’s Included: Wax warmer, All-purpose Honee Wax, Pre Hon Pre-Epilation Cleanser, Pre Epilation Powder, Wax Off Remover, Slow Grow Skin Maintenance Lotion, applicators, and muslin strips.
Bliss Poetic Waxing Kit
Why It’s Great for Beginners: This kit is microwaveable, which means you don’t need a wax warmer. It includes a pre-waxing oil to ensure the wax adheres to the hair rather than the skin, reducing pain and making the process smoother. Its stripless wax formula is also suited for sensitive areas, ideal for beginners worried about irritation.
What’s Included: Microwaveable cup filled with wax, pre- and post-waxing oil, large and small spatulas.
Veet Ready-to-use Wax Strip Kit
- Why It’s Great for Beginners: For those who prefer a no-heat, less messy option, the Veet Ready-to-use Wax Strip Kit is perfect. It’s incredibly easy to use with pre-coated wax strips that you warm up with your hands, apply, and remove. This kit is particularly suitable for beginners looking for a quick and easy hair removal solution.
- What’s Included: Pre-coated wax strips in different sizes, perfect for various body parts, and post-waxing wipes to clean and soothe the skin.
Sally Hansen Hair Remover Wax Strip Kit
- Why It’s Great for Beginners: Similar to the Veet kit, this option from Sally Hansen is ideal for first-timers due to its simplicity. No heating is required, and the strips can be used on multiple areas of the body. The kit also includes azulene oil to soothe the skin post-waxing.
- What’s Included: Pre-waxed strips for the face and body, azulene finishing oil.
Wax Warmer Hair Removal Kit by Lifestance
- Why It’s Great for Beginners: This kit offers a professional waxing experience with the comfort of doing it at home. It includes a wax warmer, three different types of wax beads for varying skin and hair types, and pre- and post-wax sprays to ease the process. The inclusion of different wax formulas allows beginners to experiment and find what works best for their skin.
- What’s Included: Wax warmer, hard wax beans in three varieties, pre-wax spray, post-wax spray, and applicators.
Lifestance Waxing Kit: This kit comes with a digital wax warmer, 4 packs of wax beads (14.1 oz total), and 42 items, making it a professional-grade kit for all hair types. It is priced at $39.89 and has a rating of 4.5 stars out of 5 from 130 shoppers on Amazon.
TIKESI Waxing Kit: This kit includes a wax warmer for hair removal, hard wax beans for full body, legs, face, eyebrows, bikini, Brazilian waxing for women men. It is priced at $29.99 and has a rating of 5 stars out of 5 from 2 shoppers on Amazon.
Maxpearl Wax Kit: This kit comes with hard wax beans for coarse hair bikini eyebrow, cream white wax beads refills for wax war. It is priced at $25.99 and has a rating of 4.5 stars out of 5 from 84 shoppers on Amazon.
Wax Warmer For Hair Removal, LEMONTRA Wax Kit: This kit comes with 4 wax beads and is suitable for women and men with sensitive skin. It is priced at $17.99 and has a rating of 4.5 stars out of 5 from 74 shoppers on Amazon.
Read more: how to make waxing less painful without numbing cream
Why choose at home waxing safe?
Choosing at-home waxing can be a safe, effective, and convenient option for hair removal if done correctly. While professional waxing services offer their own set of benefits, at-home waxing has become increasingly popular for several 7 reasons:
Cost-Effectiveness: In-house waxing kits are generally more affordable than professional waxing services. Over time, the savings can be significant, especially if you maintain a regular waxing schedule.
Convenience: Waxing at home means you can do it at your own pace and on your own schedule, without the need to book appointments or travel. This is particularly appealing for those with busy lifestyles or limited access to professional waxing services.
Privacy and Comfort: For many, the idea of waxing is a private affair, and being able to do it in the comfort and privacy of their own home is a big plus. This is especially true for more intimate areas, where some individuals may feel more comfortable handling things themselves.
Control Over Hygiene: When you wax at home, you have complete control over the cleanliness and hygiene of the process. You know exactly how the tools and products are handled, stored, and used, reducing the risk of infections.
Ability to Customize: Everyone’s pain threshold, skin sensitivity, and hair type are different. At-home waxing allows you to customize the process to suit your specific needs, whether it’s choosing the type of wax, the speed at which you wax, or the aftercare products you use.
Cost-Effectiveness
At-home waxing kits are generally more affordable than professional waxing services. Over time, the savings can be significant, especially if you maintain a regular waxing schedule.
Convenience
Waxing at home means you can do it at your own pace and on your own schedule, without the need to book appointments or travel. This is particularly appealing for those with busy lifestyles or limited access to professional waxing services.
Privacy and Comfort
For many, the idea of waxing is a private affair, and being able to do it in the comfort and privacy of their own home is a big plus. This is especially true for more intimate areas, where some individuals may feel more comfortable handling things themselves.
Control Over Hygiene
When you wax at home, you have complete control over the cleanliness and hygiene of the process. You know exactly how the tools and products are handled, stored, and used, reducing the risk of infections.
Ability to Customize
Everyone’s pain threshold, skin sensitivity, and hair type are different. At-home waxing allows you to customize the process to suit your specific needs, whether it’s choosing the type of wax, the speed at which you wax, or the aftercare products you use.
Safety Considerations: To ensure a safe at-home waxing experience, consider the following tips:
- Patch Test: Always perform a patch test on a small area of skin to check for allergic reactions or extreme sensitivity.
- Follow Instructions: Read and follow the kit’s instructions carefully, especially regarding temperature control and application techniques.
- Skin Preparation: Ensure your skin is clean, dry, and free of oils or lotions before waxing. Exfoliating a day before can help remove dead skin cells and reduce the risk of ingrown hairs.
- Aftercare: Apply a soothing lotion or aloe vera to calm the skin and avoid sun exposure, hot showers, or chlorinated pools for the first 24 hours after waxing.
- Know When Not to Wax: Avoid waxing over areas with wounds, moles, sunburns, or skin conditions. If you’re using retinoids or acne treatments, consult with a dermatologist before waxing, as these can make the skin more sensitive.
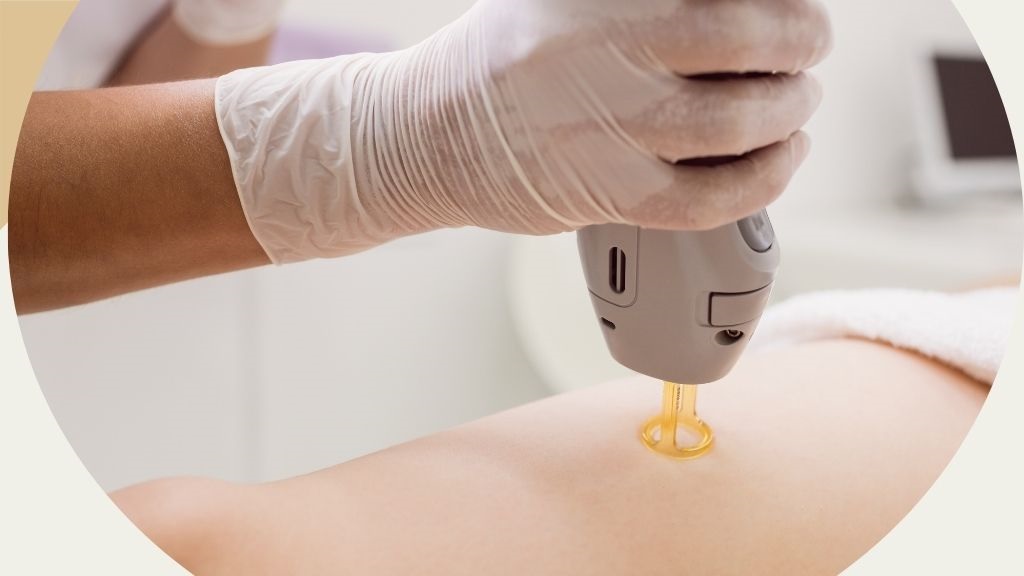
At-home waxing can be a safe and effective method for hair removal when you take the proper precautions but it will not be the best compared to hair removal laser technology. By choosing the right products, preparing your skin correctly, and following best practices for waxing and aftercare, you can achieve smooth, long-lasting results while enjoying the convenience and privacy of doing it yourself.
How do I prepare my skin for waxing at home?
Proper skin preparation is crucial for a successful and less painful waxing experience, especially when doing it at home. Here’s a comprehensive guide to prepare your skin for waxing, which can help minimize discomfort and maximize the effectiveness of the waxing process:
- Check Hair Length: Ensure your hair is the right length for waxing, which is typically about ¼ inch long. This length allows the wax to grip the hair properly without being too long, which can cause more pain.
- Exfoliate: 24 to 48 hours before waxing, gently exfoliate the skin in the area you plan to wax. This removes dead skin cells and can help prevent ingrown hairs. Use a body scrub or an exfoliating glove, but be gentle to avoid irritating the skin.
- Cleanse the Area: Before waxing, make sure the area is clean and free from oils, creams, or makeup. Use a mild, non-moisturizing soap and water, or a pre-wax cleanser if your kit includes one. This helps the wax adhere better to the hair.
- Dry Your Skin: Pat the skin dry thoroughly after cleansing. Any moisture on the skin can prevent the wax from adhering properly, making the waxing less effective.
- Avoid Moisturizers and Lotions: Do not apply lotions, oils, or moisturizers to the area to be waxed on the day of your waxing session. These products can create a barrier between the wax and your skin, reducing the grip on the hair.
- Test for Skin Sensitivity: If you have sensitive skin or are using a new waxing kit, it’s a good idea to do a patch test. Apply a small amount of wax to a part of your body that’s similar to the area you plan to wax. Wait 24 hours to ensure there’s no adverse reaction.
- Consider the Timing: Some people find their skin is more sensitive during certain times, such as just before or during their menstrual cycle. Plan your waxing session when your skin is least sensitive if possible.
- Hydrate Your Body: Drink plenty of water in the days leading up to your waxing session. Well-hydrated skin is more pliable, making the waxing process slightly less painful.
- Wear Comfortable Clothing: On the day of waxing, wear loose, comfortable clothing to avoid any friction on the waxed area. This is especially important for areas like the bikini line or underarms.
- Relax: Before starting, try to relax. Stress and tension can make the skin more sensitive to pain. Take deep breaths, and consider using a numbing cream if you’re particularly worried about discomfort (just be sure it’s safe for use with waxing and test it on your skin first).
By following these preparatory steps, you can help ensure that your at-home waxing experience is as efficient, effective, and comfortable as possible. Proper preparation not only contributes to the success of the waxing itself but can also help in reducing post-waxing irritation and ingrown hairs.
How to use an at home waxing kit for a beginner for women?
Using an at-home waxing kit for the first time can seem daunting, but with the right approach, it can be a manageable and even empowering beauty routine. Here’s a step-by-step guide designed to help beginners navigate their first at-home waxing experience successfully:
Choose the Right Kit
Select a waxing kit that suits your specific needs—consider the area you’re waxing, your skin type, and whether you prefer hard wax, soft wax, or pre-made wax strips. For beginners, a kit with detailed instructions and post-wax care products is ideal.
Read the Instructions Carefully
Before you dive in, thoroughly read through the instructions provided with your kit. This will give you a clear understanding of how to heat the wax (if necessary), how to apply it, and how to remove it properly.
Prepare Your Skin
- Cleanse: Ensure the area to be waxed is clean and free from oils or lotions. Some kits come with a pre-wax cleanser.
- Dry: Pat the skin dry. You can use a little bit of baby powder to absorb any excess moisture if recommended by your wax kit.
- Check Hair Length: Hair should be about ¼ inch long for the wax to grab onto. If it’s too long, trim it to a manageable length.
Test the Wax Temperature: If your kit requires heating the wax, always test its temperature on a small part of your wrist to avoid burns. The wax should be warm, not hot.
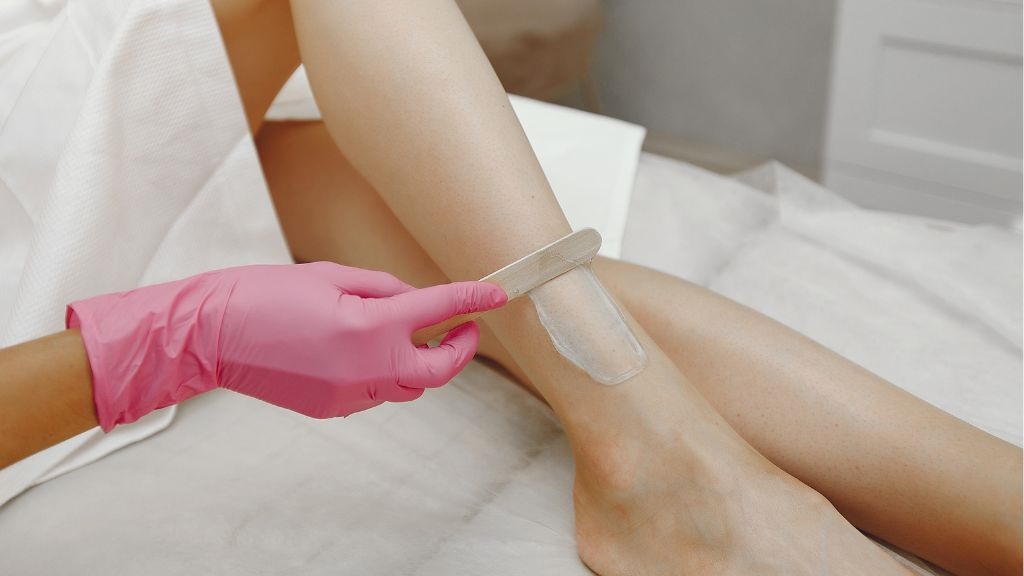
Apply the Wax
- Direction: Apply the wax in the direction of hair growth. If using a spatula, spread a thin, even layer.
- For Hard Wax: Wait until it hardens (but is still pliable). This usually takes a few seconds to a minute, depending on the wax.
- For Soft Wax: Place a strip over the applied wax and smooth it out firmly in the direction of hair growth.
Remove the Wax
- Hard Wax: Grip the edge and pull it off quickly against the direction of hair growth in one smooth motion.
- Soft Wax: Hold the skin taut with one hand and quickly pull the strip off with the other hand, against the direction of hair growth.
Post-Wax Care
- Soothe the Skin: Apply a post-wax soothing lotion or oil to calm the skin and reduce redness. Avoid perfumed products as they can irritate the skin.
- Avoid Heat and Friction: For the next 24 hours, avoid hot showers, saunas, or friction in the waxed area to prevent irritation.
Additional Tips for Beginners
- Practice Makes Perfect: Don’t be discouraged if your first wax isn’t perfect. It takes practice to get the technique down.
- Timing: Consider waxing in the evening, allowing any redness to subside overnight.
- Ingrown Hairs: Exfoliate the area gently a couple of times a week to prevent ingrown hairs, but avoid exfoliating directly before and after waxing.
- Pain Management: Taking an over-the-counter pain reliever about 30 minutes before waxing can help reduce discomfort.
Waxing at home can save time and money, and with these steps, even beginners can achieve smooth, hair-free skin safely. Remember, patience and careful preparation are key to a successful at-home waxing experience.
How long does it take for hair to grow back after the waxing kit?
The time it takes for hair to grow back after waxing can vary widely depending on several factors, including your individual hair growth cycle, the area that was waxed, and how regularly you wax. However, on average, you can expect hair to start regrowing within 3 to 6 weeks after waxing. Here’s a closer look at what influences this timeline and what you can expect:
Individual Hair Growth Cycles
Every person’s hair grows at a different rate, influenced by genetics, hormonal levels, and age. Generally, hair growth occurs in three phases: anagen (growth phase), catagen (transition phase), and telogen (resting phase). Waxing removes hair from the root, which means the hair must restart its growth cycle from the anagen phase. For most people, this results in a period of smoothness before hair begins to visibly regrow.
Area of the Body
The area of the body that’s waxed also affects how quickly hair grows back. For instance, hair on the face may grow back faster than hair on the legs due to different hair growth cycles and densities. Commonly waxed areas like the eyebrows, upper lip, and underarms might show regrowth sooner than the back, chest, or legs.
Regular Waxing can eventually lead to finer, sparser hair growth over time. This is because repeated waxing can weaken the hair follicles, causing the hair that does regrow to be less coarse. People who wax consistently every 4 to 6 weeks might notice that it takes longer for hair to regrow after several sessions.
What to Expect
- First Week: The area remains mostly smooth as hair follicles are empty.
- 2-3 Weeks: You might start to notice some regrowth, particularly if your hair grows quickly. This new growth is usually finer and softer initially.
- 4-6 Weeks: By this time, most people will see enough regrowth to consider another waxing session. The exact timing depends on your personal preference for hair length and the effectiveness of the previous waxing. If you want to remove hair all over your body quick, come to Studio 165 Nail Artists
Top 5 the best wax strips for the bikini area in 2030?
When it comes to waxing the bikini area, choosing the right wax strips is crucial for achieving smooth, effective results while minimizing discomfort and irritation. The bikini area is sensitive, and the skin there can be prone to irritation and ingrown hairs. Therefore, it’s important to select wax strips designed specifically for sensitive skin or formulated for the bikini area. Here are some highly recommended wax strips for the bikini area on 2030, known for their effectiveness and gentle formulas:
- Veet Ready-to-Use Wax Strip Kit for Bikini & Underarm: Veet’s wax strips are designed for sensitive areas like the bikini line and underarm. They’re enriched with almond oil and Vitamin E to help soothe and moisturize the skin. The strips are easy to use, and the kit includes finishing wipes to remove any wax residue and soothe the skin after waxing.
- Nad’s Body Wax Strips for Sensitive Skin: Why It’s Great: Nad’s Body Wax Strips are hypoallergenic and infused with honey and chamomile to calm and soothe sensitive skin, making them ideal for the bikini area. The strips are made with a soft, flexible fabric that conforms to the curves of your bikini area for effective hair removal.
- Sally Hansen Hair Remover Wax Strip Kit for Face & Bikini: Sally Hansen’s wax strips are versatile, working well on the face and bikini area. These strips come pre-waxed and are formulated with added botanicals such as shea butter, known for its skin-conditioning properties. The kit also includes azulene oil to soothe the skin post-waxing.
- Gigi Brazilian Waxing Kit: Although not a traditional strip wax, the Gigi Brazilian Waxing Kit is a comprehensive set that includes hard wax, which many find to be more effective and less painful for the bikini area. It adheres well to coarse hair and is designed to pull hair from the root without sticking to the skin, making it a good option for those comfortable with a slightly more involved waxing process.
- Bliss Poetic Waxing Wax Strips for Body: Bliss offers wax strips that can be used on the body, including the bikini area. These strips are made with aloe vera to help soothe and calm the skin. The kit is simple to use and includes post-waxing oil to remove residue and reduce any potential irritation.
Tips for Using Wax Strips on the Bikini Area:
- Test a Small Area First: Before using any wax strip on your bikini area, do a patch test on a less sensitive part of your body to ensure you don’t have an allergic reaction.
- Follow the Directions: Read and follow the instructions carefully for the best results and to minimize the risk of irritation.
- Hold the Skin Taut: When waxing, hold the skin taut to make the process less painful and more effective.
- Aftercare is Important: After waxing, apply a soothing lotion or oil to calm the skin. Avoid tight clothing, hot baths, and exposure to the sun immediately after waxing to reduce irritation.
- Choosing the right wax strips for the bikini area and following best practices can help ensure a smoother, more comfortable waxing experience.
Conclusion
At-home waxing doesn’t have to be daunting. With the right kit and a bit of practice, you can achieve smooth, hair-free skin. Whether you’re looking for the convenience of pre-made strips or the versatility of traditional wax, there’s a beginner-friendly kit out there for you. Remember to take your time, follow the instructions, and care for your skin before and after waxing. Happy waxing!
- #1 How to do DIY gel nails for beginners at home
- #1 Debunking the Myths: Do gel nails ruin your nails?
- [ The average ] How much do nail techs make a year?
- #1 When is national nail tech day | 2027
- Comprehensive guide are pedicures safe during pregnancy


 to have themselves prettified
[…] Read more: best at home waxing kit for beginners […]
thank you very much my friend
yes? It’s very good for beginners